
You have just been given the admin login for TihTur. Where do you start?
Before forms, workflows or dashboards, TihTur needs to know where people work and what they do there. That comes down to four steps, done once per school or branch. This post walks through them with a real example: adding a new branch, Nihoc International Kondapur, to the Nihoc schools.
Before you start: switch on Admin Mode #
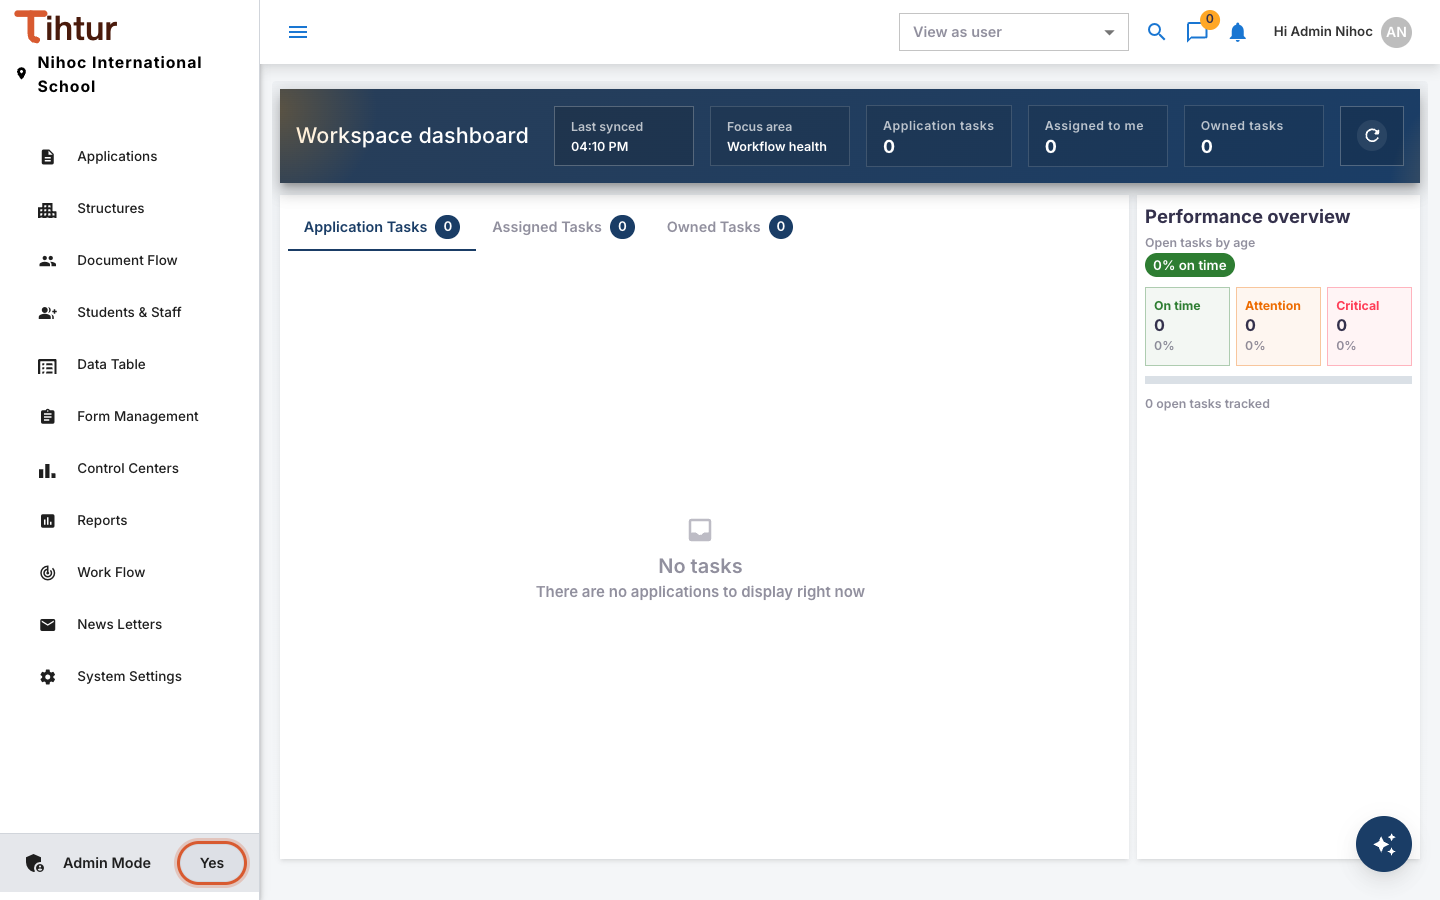
Log in with the admin account. At the bottom of the left menu you will see Admin Mode. Switch it to Yes. The menu now shows all the setup pages: Structures, Document Flow, Students & Staff, Data Table, Form Management, Control Centers, Work Flow, News Letters and System Settings.
We will create:
| What | Example |
|---|---|
| A property role | NIHOCKP_PR |
| A branch (entity) | Nihoc International Kondapur, code NIHOCKP |
| Roles for the branch principal | NIHOCKP_Principal_JR (job), NIHOCKP_PrincipalApproval_AR (approval), NIHOCKP_BranchRecords_SR (security) |
| The first staff user | Kavitha Iyer, the Kondapur principal |
Step 1: Create the property role #
A property role marks who belongs to a branch. Everyone who holds it sees the branch, and only its tasks.
- Open Students & Staff and go to the Roles Type tab. The role type Property Role is already available. Only if it is missing in your system, add it here, one time.
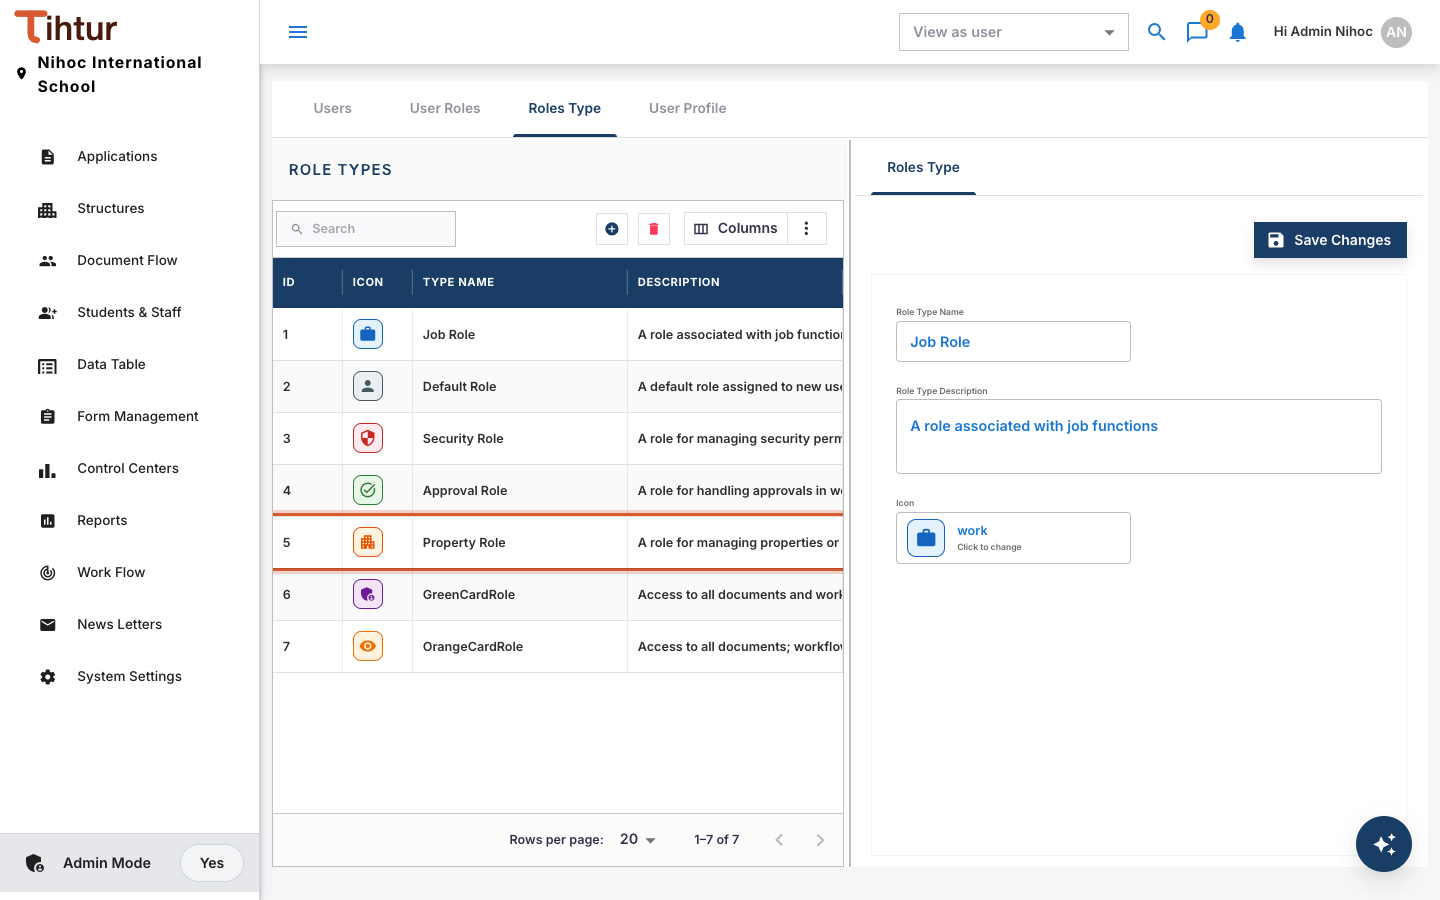
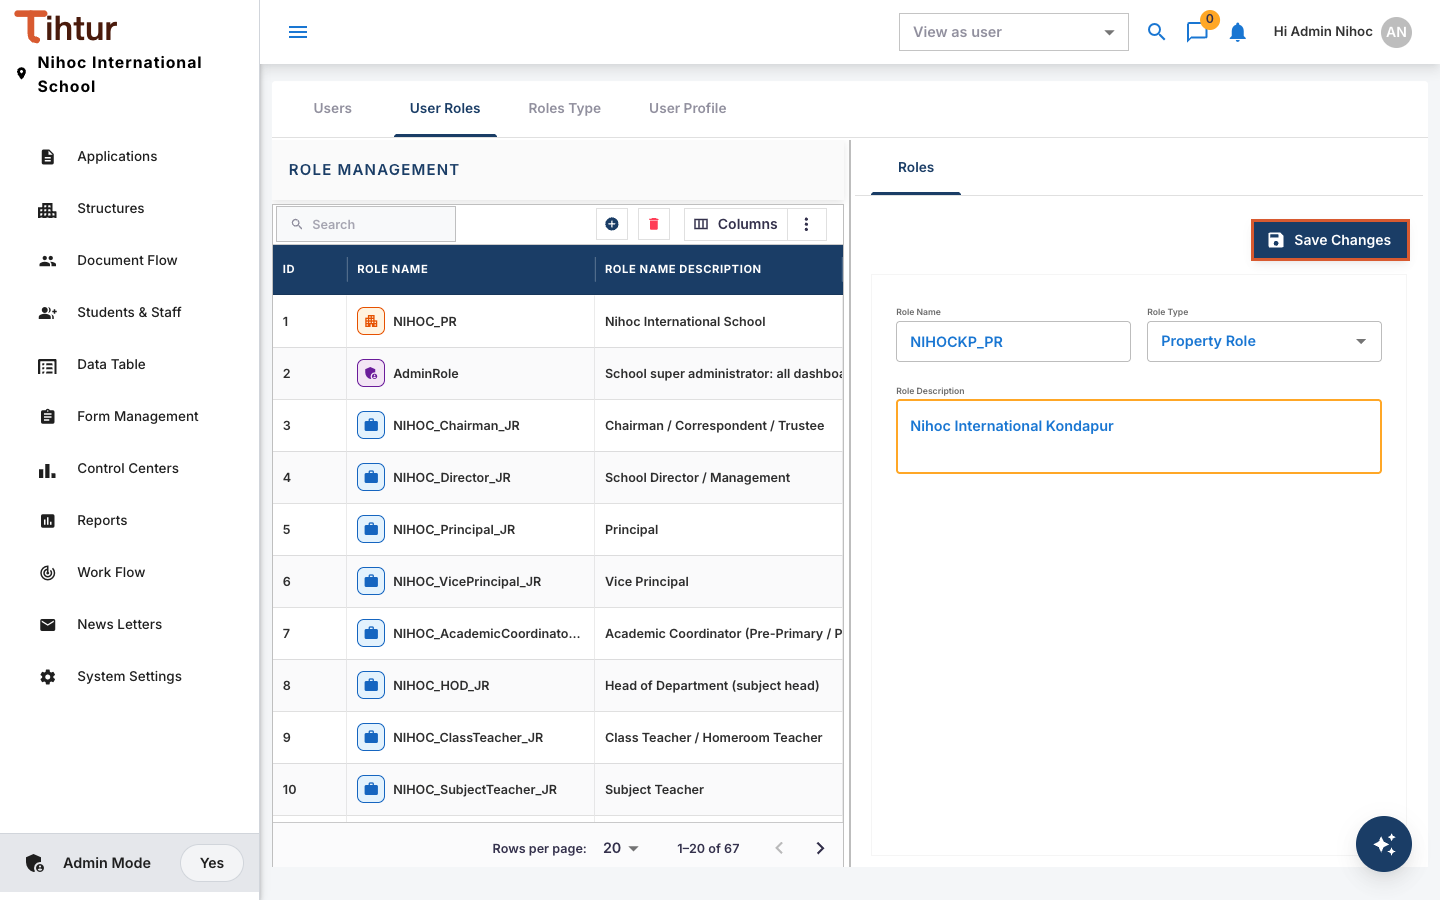
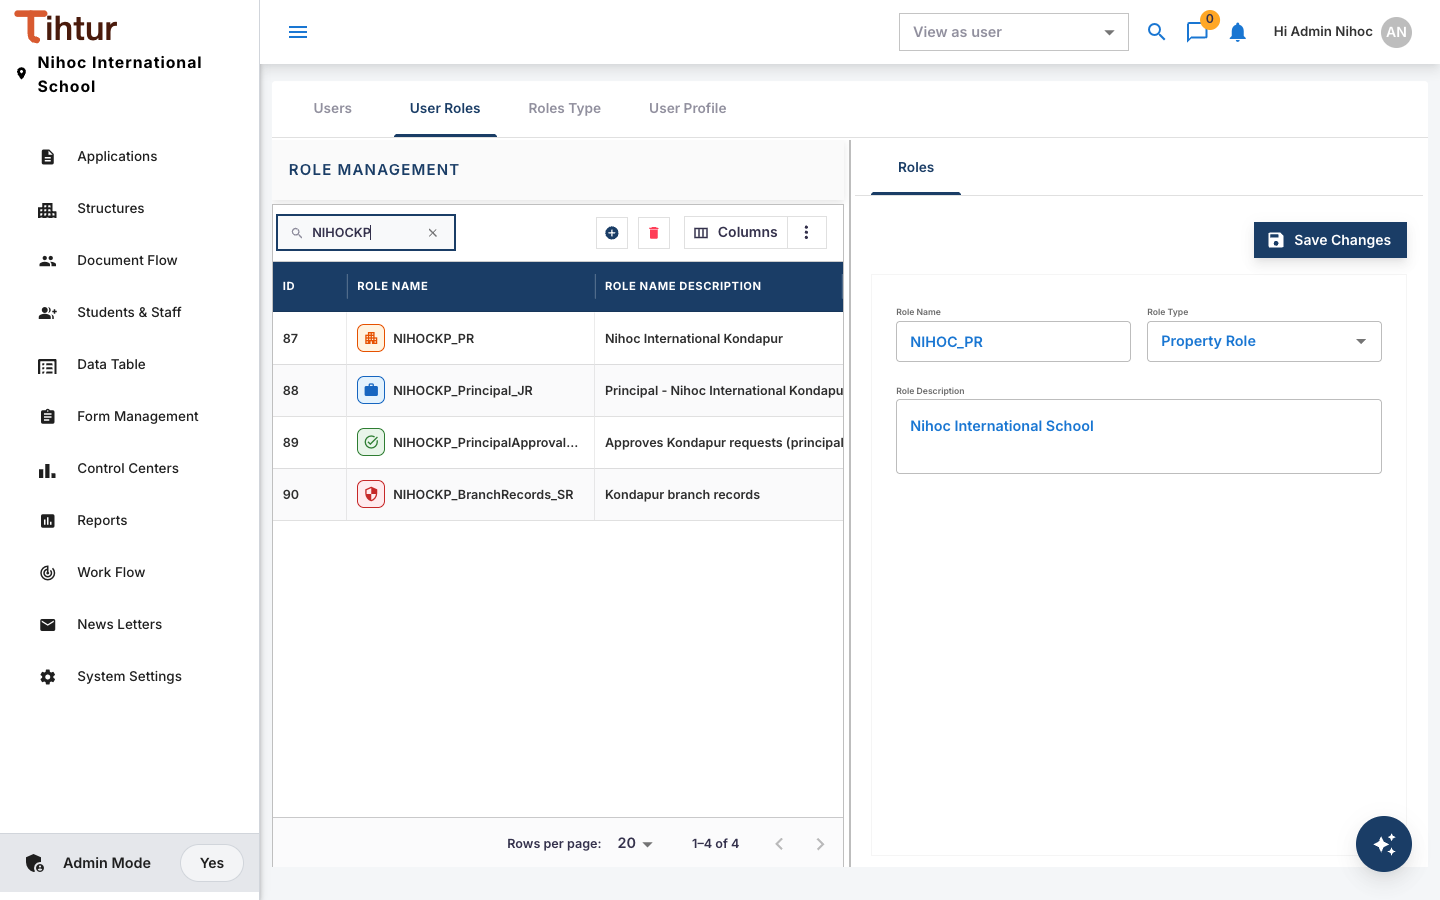
- Go to the User Roles tab and click on the add button above the list.
- Give the Role Name
NIHOCKP_PR, select the Role Type Property Role, and give the description Nihoc International Kondapur. - Click on Save Changes.
Naming tip: start with the branch code and end with the role type:
_PRproperty,_JRjob,_ARapproval,_SRsecurity. Lists then sort neatly and nobody mixes up the types.
Step 2: Create the branch and give it the property role #
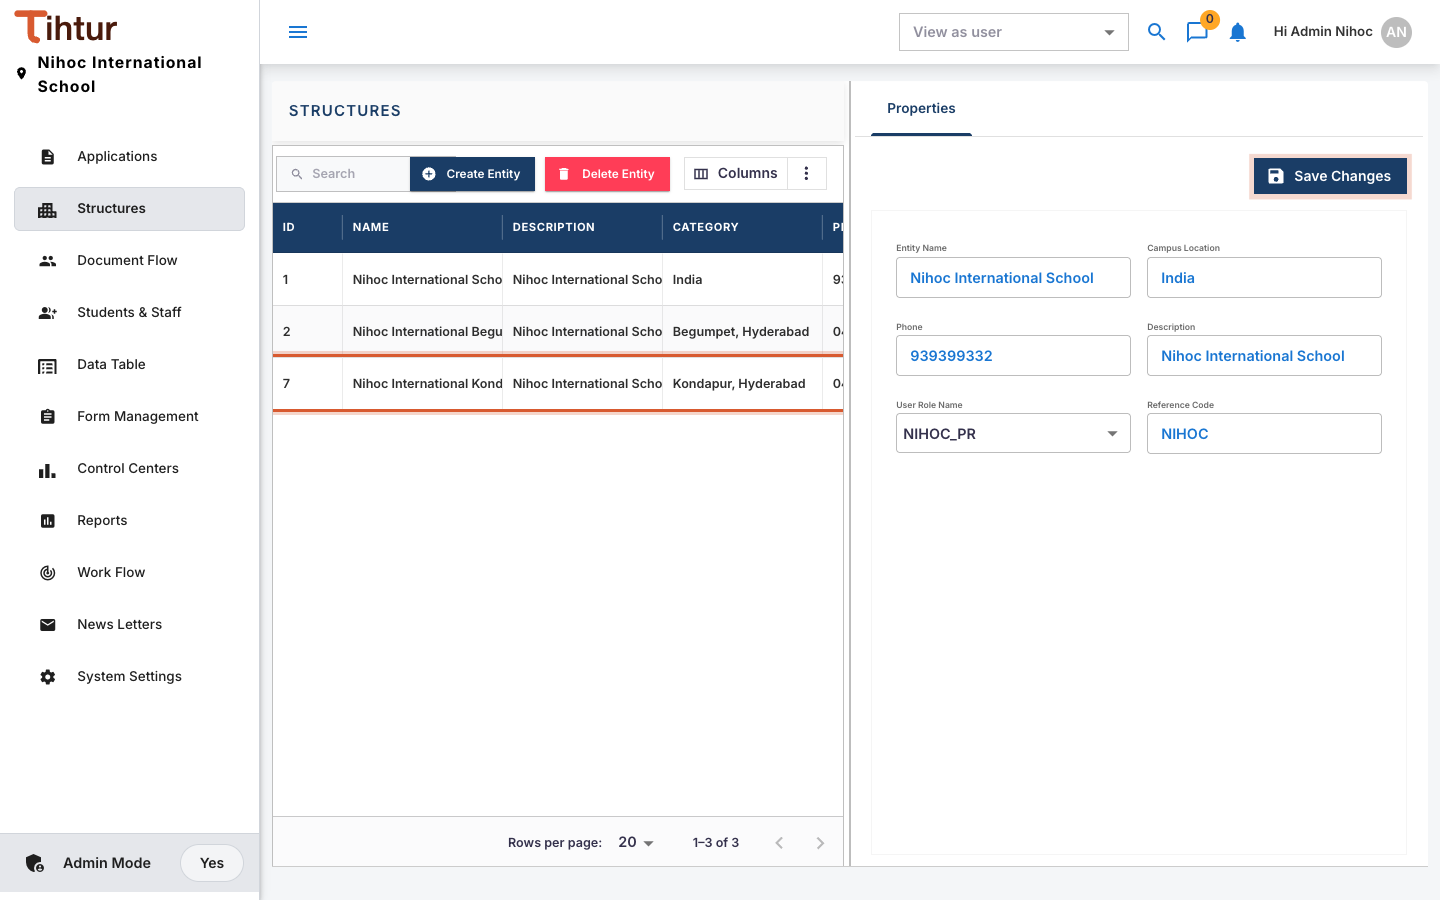
- Open Structures and click on Create Entity.
- Fill in the Entity Name, Campus Location, Phone and a small Description. Please note, the phone number should have only digits.
- In User Role Name, select the property role from step 1,
NIHOCKP_PR. - Give the Reference Code
NIHOCKP, a short unique code used in document numbers. - Click on Save Changes.
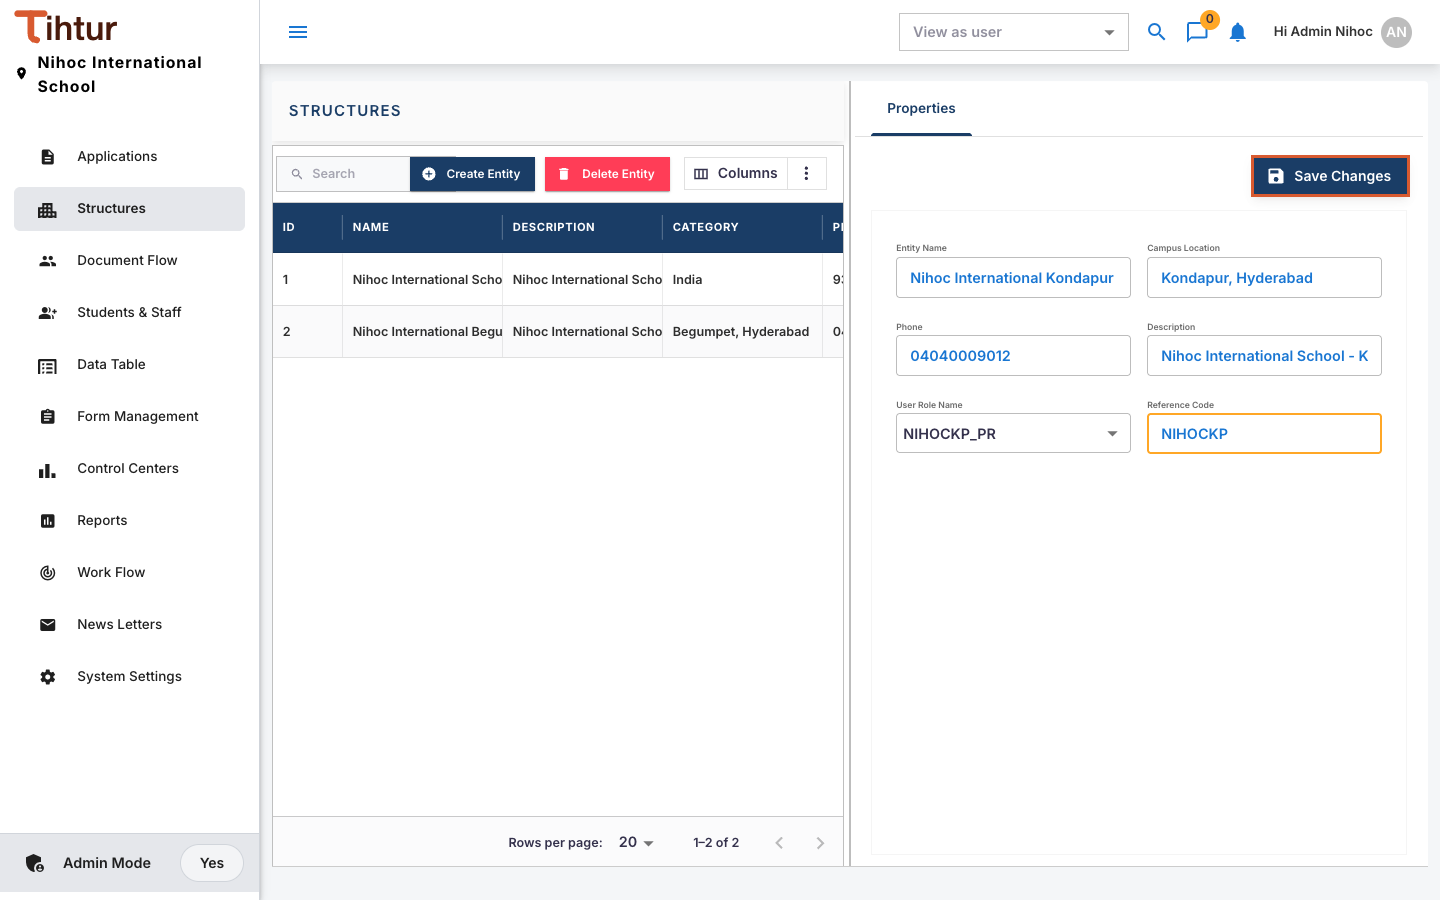
The branch is now showing in the list. Whoever has its property role will see it under Select School.
Step 3: Create the roles for the branch #
Workflows ask roles to act, never named people. So for the Kondapur principal we create three roles, each with its own role type:
| Role | Role type | Why |
|---|---|---|
NIHOCKP_Principal_JR |
Job Role | The position itself |
NIHOCKP_PrincipalApproval_AR |
Approval Role | So the principal can approve the branch's requests |
NIHOCKP_BranchRecords_SR |
Security Role | So the principal can search and see the branch's records |
- Go back to Students & Staff → User Roles and click on add.
- Give the Role Name, select the Role Type from the table above, give a clear description, and click on Save Changes.
- Do the same for the other two roles.
Use the suitable roles that already exist #
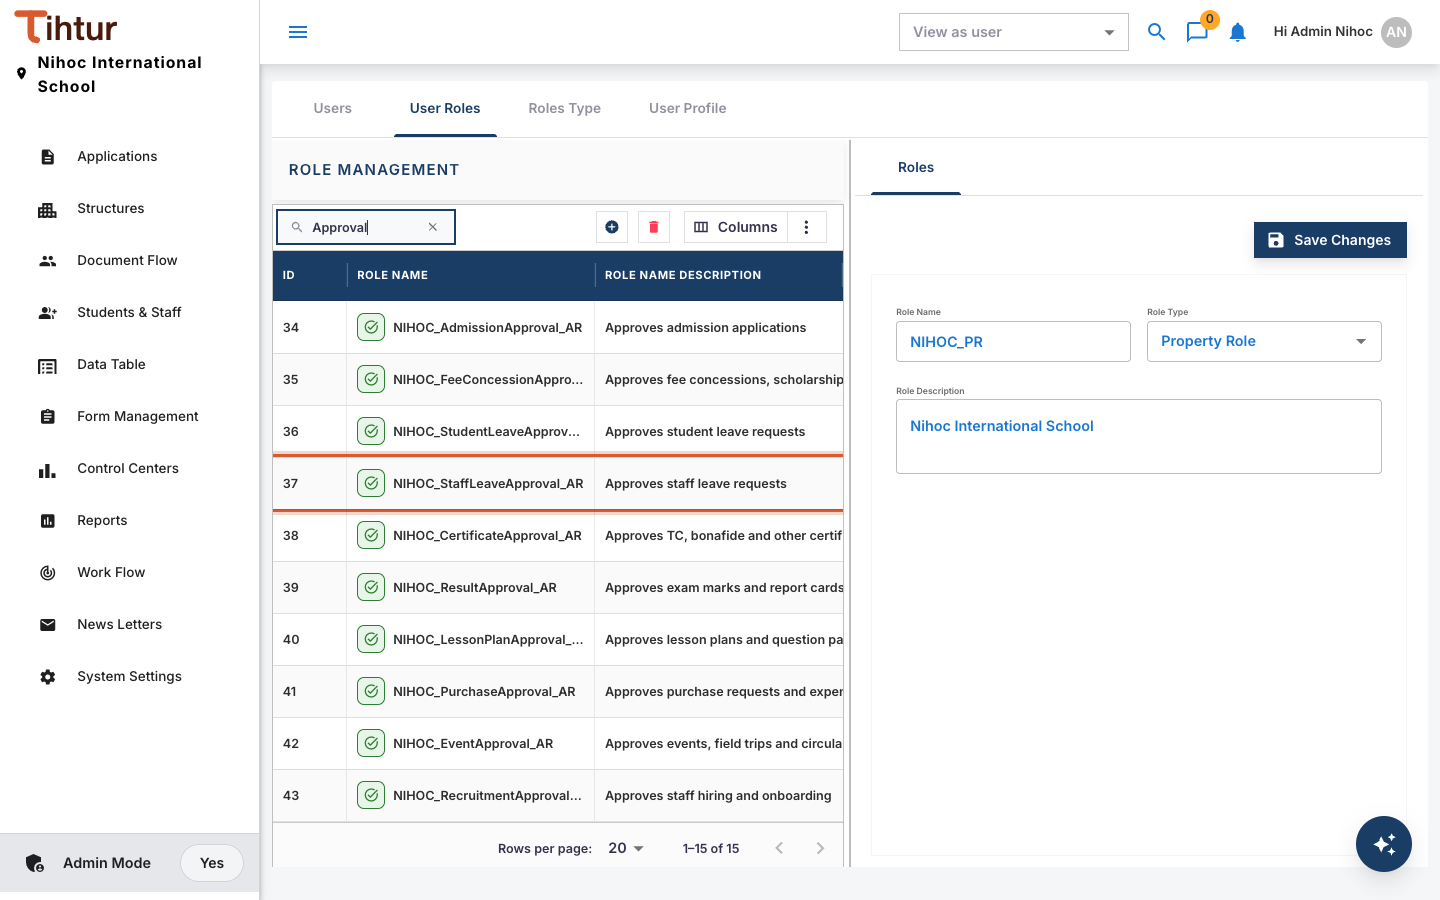
The school already has suitable roles for a principal, such as NIHOC_StaffLeaveApproval_AR and NIHOC_AdmissionApproval_AR. These are already used as approvers in the workflows, so we will give them to the new principal also. Because approvers must also hold the task's property role, the Kondapur principal will approve only Kondapur's staff leave and admissions.
Step 4: Create a job user with those roles and the property role #
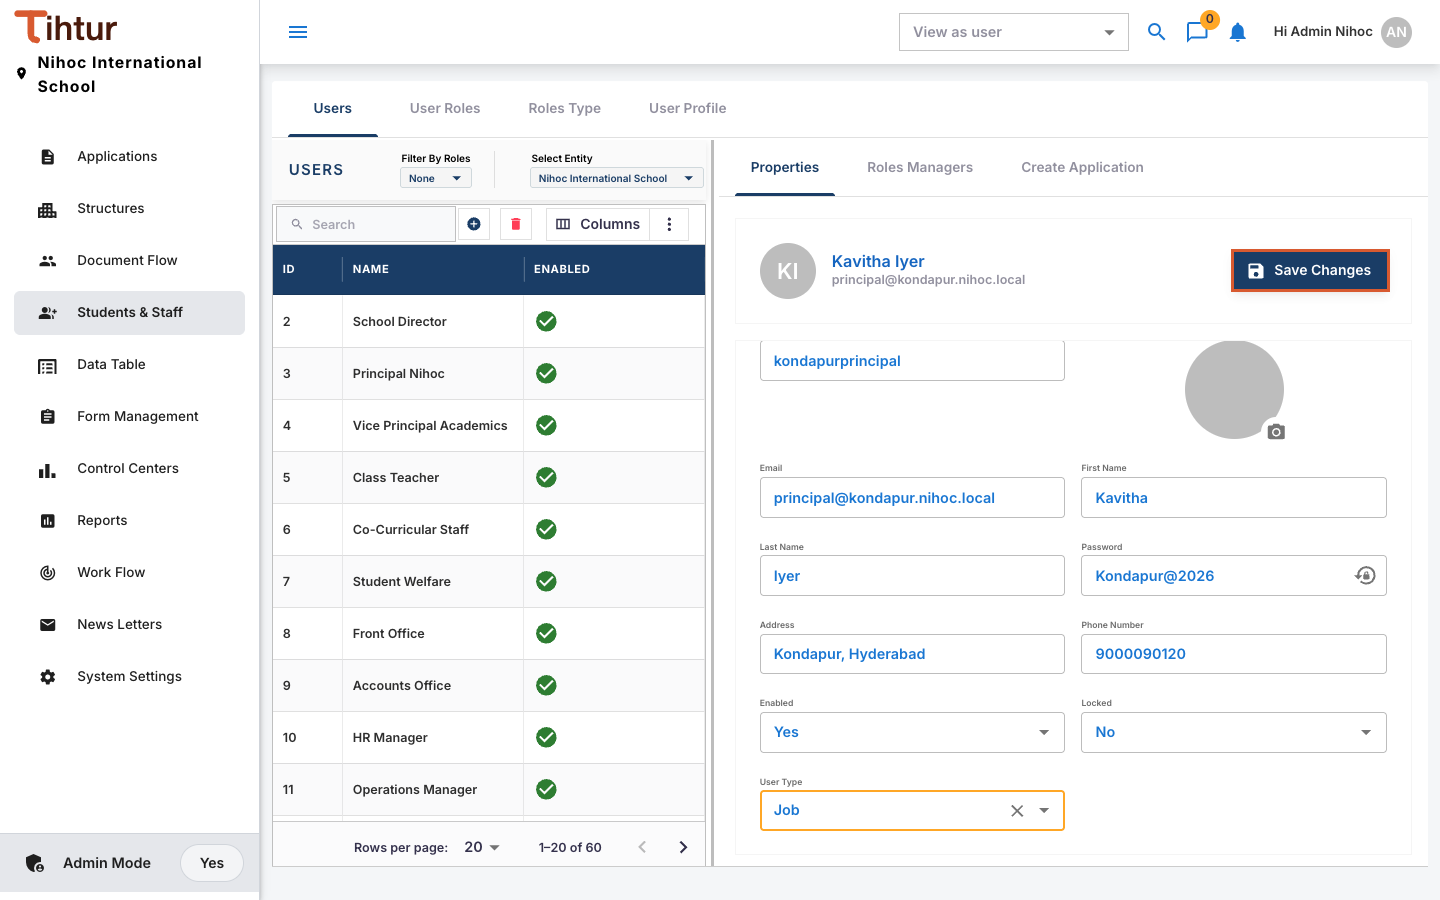
- On the Users tab, click on add and fill in the Username (only letters and numbers, no dots or spaces, for example
kondapurprincipal), Email, First Name, Last Name, a first Password, the Address and Phone Number. - Select the User Type Job, the type for staff, and click on Save Changes.
- Select the new user in the list and open Roles Managers.
- Search
NIHOCKPunder All Roles and click on + for the branch's property role and the principal's job, approval and security roles. - Search and add the existing approval roles,
NIHOC_StaffLeaveApproval_ARandNIHOC_AdmissionApproval_AR.
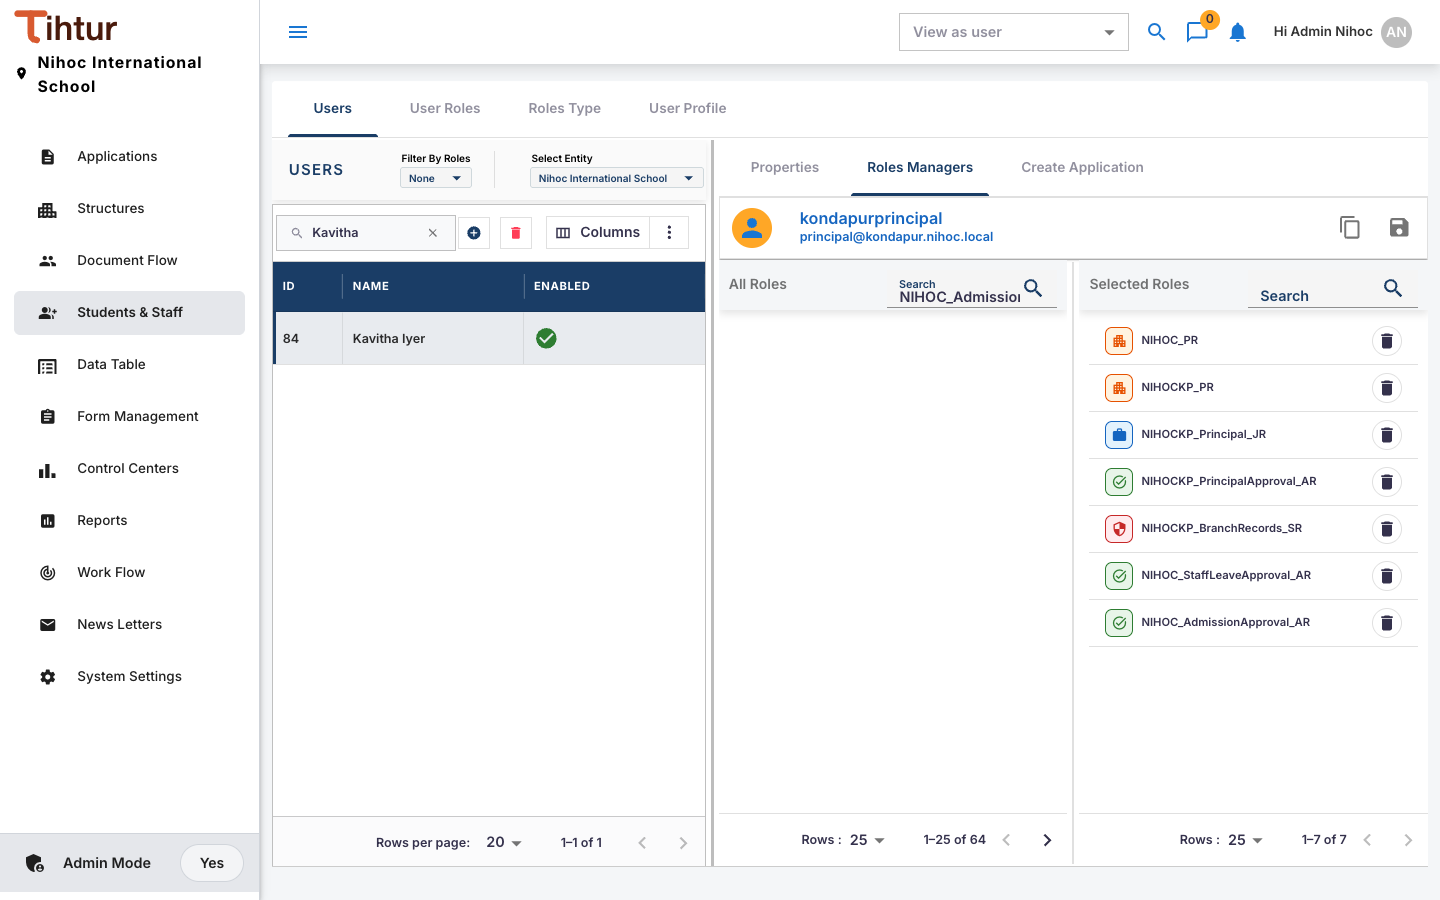
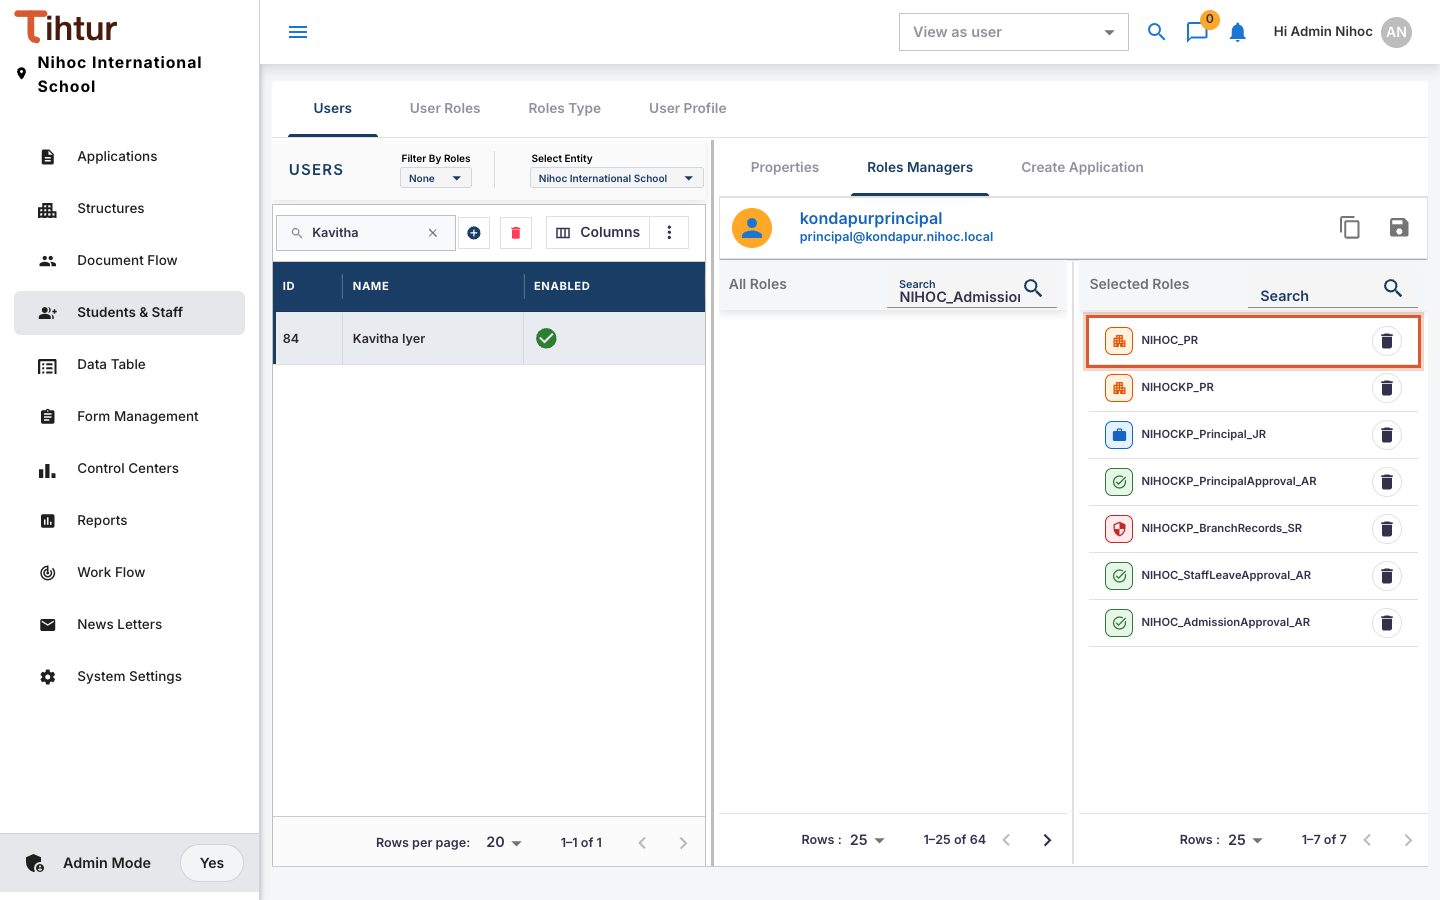
- One small thing: a new user gets the property role of the school selected above the list. If she is working only at Kondapur, remove the main campus role (
NIHOC_PR) from Selected Roles.
- Click on the save icon.
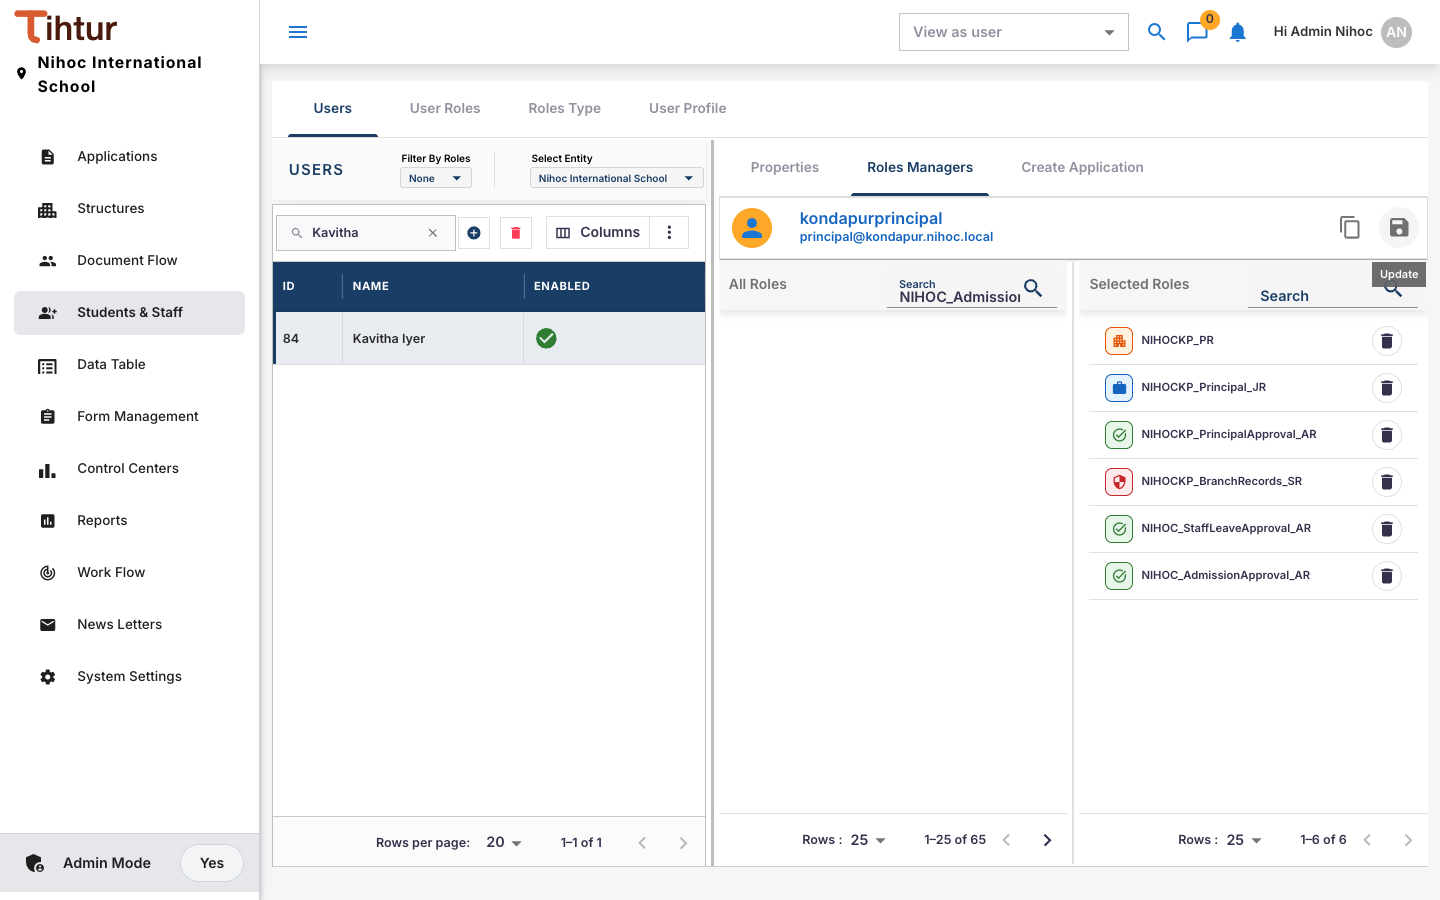
What you have now #
When Kavitha logs in, she sees Nihoc International Kondapur and only its tasks, and she can approve its staff leave and admissions.
Next steps:
- Add the new roles to the approver lists of your workflow steps (Workflows).
- Give the branch's documents access for its security role (Who can see and act).
- Give the branch's other staff the property role and their job roles (Users).
- Read the full setup order in the Setup plan and checklist.