
Users #
Every person who signs in needs a user. A user brings together everything set up so far: their user type, their school, their roles and their profile type.
User types #
| User type | For | What they see |
|---|---|---|
| Job | Teachers and staff | My Tasks, Create, Applications, Search, and dashboards if their profile allows |
| Default | Parents and students (portal users) | Their own applications, Apply Online, and Help Desk |
| Admin | The office that runs the system | Everything, plus the setup pages |
| Entity Admin | A branch-level administrator account | Staff pages, for running one school or branch |
Add a user #
Open Students & Staff → Users and press the add button above the list.
Fill in the details:
Field Notes First Name, Last Name As they should appear on tasks Username What they type to sign in, for example ramesh.kumarEmail Where emails such as reminders and password resets go Server Email A second, internal email address for your records (optional; TihTur does not send mail to it) Password A first password; ask them to change it after signing in Phone Number, Address, Profile Image Contact details and photo User Type Job, Default, Admin, Entity Admin Enabled / Locked Turn sign-in off without deleting the user
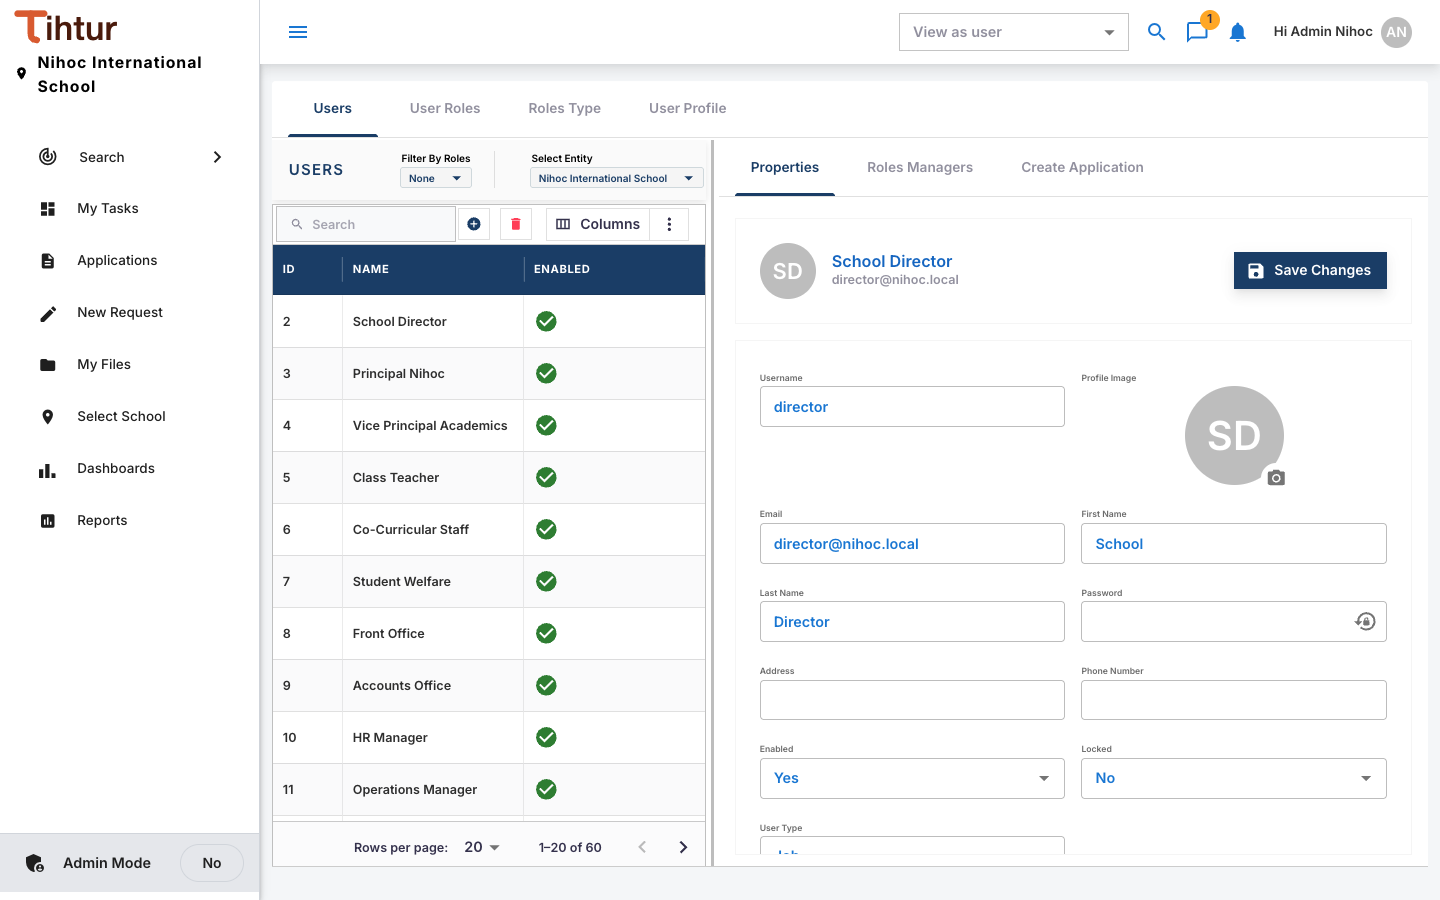
- Choose the school(s): give the property role of each campus they work in.
- Add their roles (job, approval, security). See Roles.
- Choose their profile type. See Profile types.
- Save. If your school uses the Registration email template, the user is sent a welcome email.
Parents and students #
- Give parents user type Default, the Parent and Applicant job roles, and the campus property role.
- Give students user type Default, the Student job role, the Student Portal security role, and the campus property role.
- Use one account per parent, not per child: a parent's applications for all their children appear together.
Many users at once #
For a new school year or a new campus:
- Create one user per position first, and check that it works.
- Add the rest with the same roles. Use Roles Managers to add many people to a role in one go.
- Filter the user list with All Entities / All Roles to check who has what.
When someone leaves #
Untick Enabled (or tick Locked) on their user. Their history stays intact, and their tasks can be handed to their successor by giving the successor the same roles.
Next: 6. Data tables