
Data tables (master lists) #
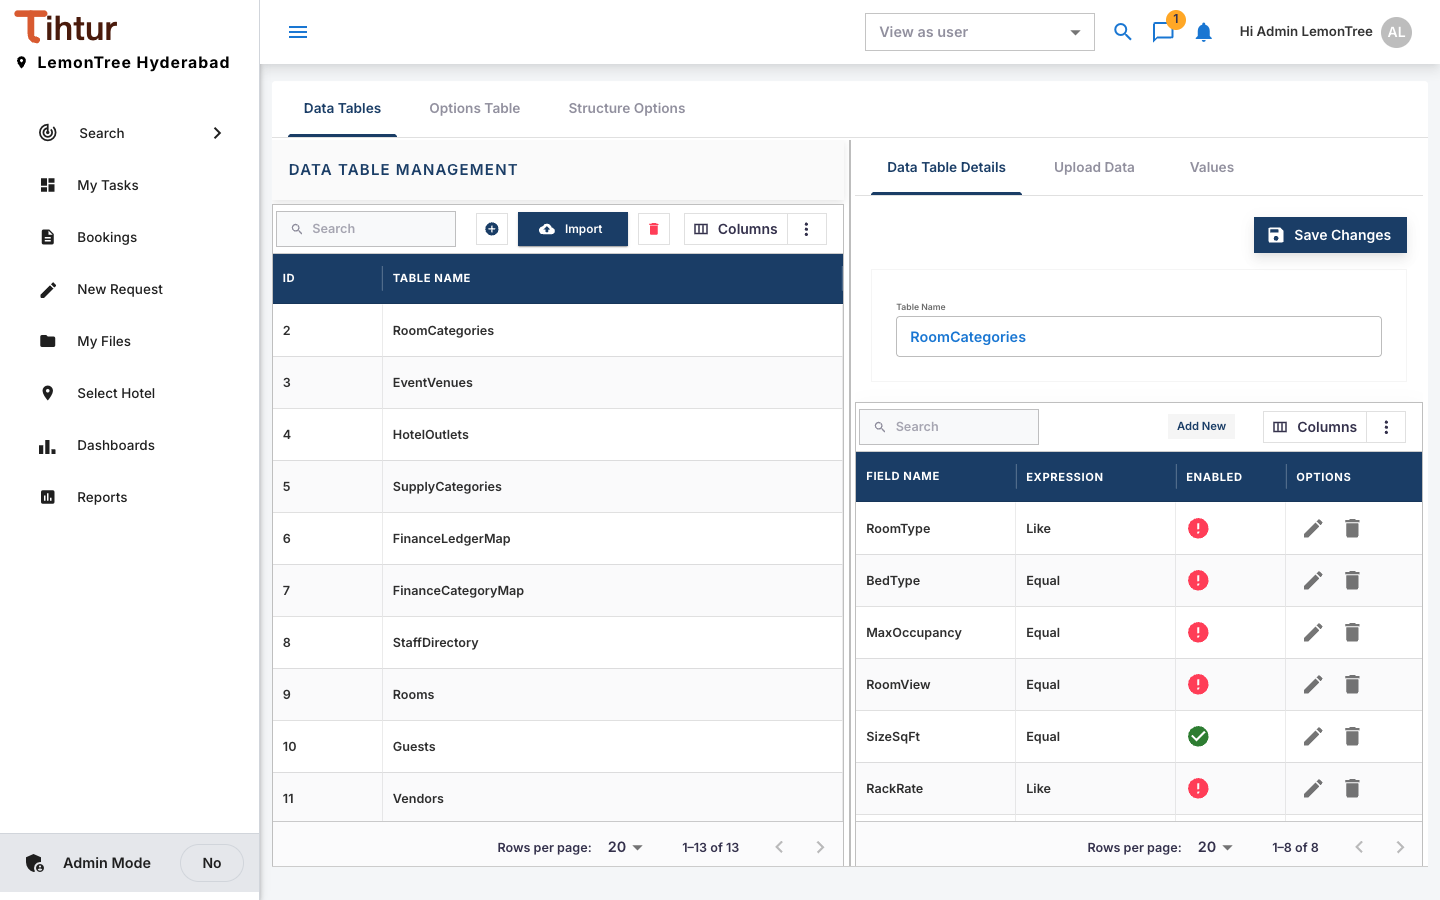
Data tables are master lists. Forms read from them, so people pick from a list instead of typing, and related fields fill in by themselves. The demo hotel has: RoomCategories, EventVenues, HotelOutlets, Rooms, Guests, Companies, StaffDirectory, Vendors, StoreItems, EquipmentRegister, SupplyCategories, FinanceLedgerMap and FinanceCategoryMap.
Create and fill a data table #
- Open Data Table from the admin menu (tab Data Tables) and press the add button. Enter the Table Name (one word) and a Description, add the fields (columns), and save. The right side has the tabs Data Table Details, Upload Data and Values (the rows).
- Add rows one at a time (Add Row, Edit Row, Delete), or press Import, use Download Sample CSV as a template, fill it in Excel, then Choose File and Upload.
Use it on a form #
Link a group of fields on a form to a data table and map each field to a column (Forms and tags).
Example: on the Guest Complaint & Service Recovery form, the Guest group is linked to Guests. Picking the Guest Name fills the Room Number.
- A fill happens only when exactly one row matches.
- Use one data table per group of fields.
- Guest, room, company, staff, vendor, store and equipment lists are staff only: guests, corporate clients and vendors signing in to the portal never see their rows.
Options lists #
Short fixed lists such as Event Type, Leave Type or Payment Mode live on the Options Table tab and can be used on any drop-down, radio or checkbox field.