
Roles #
Roles are the heart of access in TihTur. Workflows say "the Principal approves", not "Mrs Rao approves". When people change jobs, you move the role and nothing else needs to change.
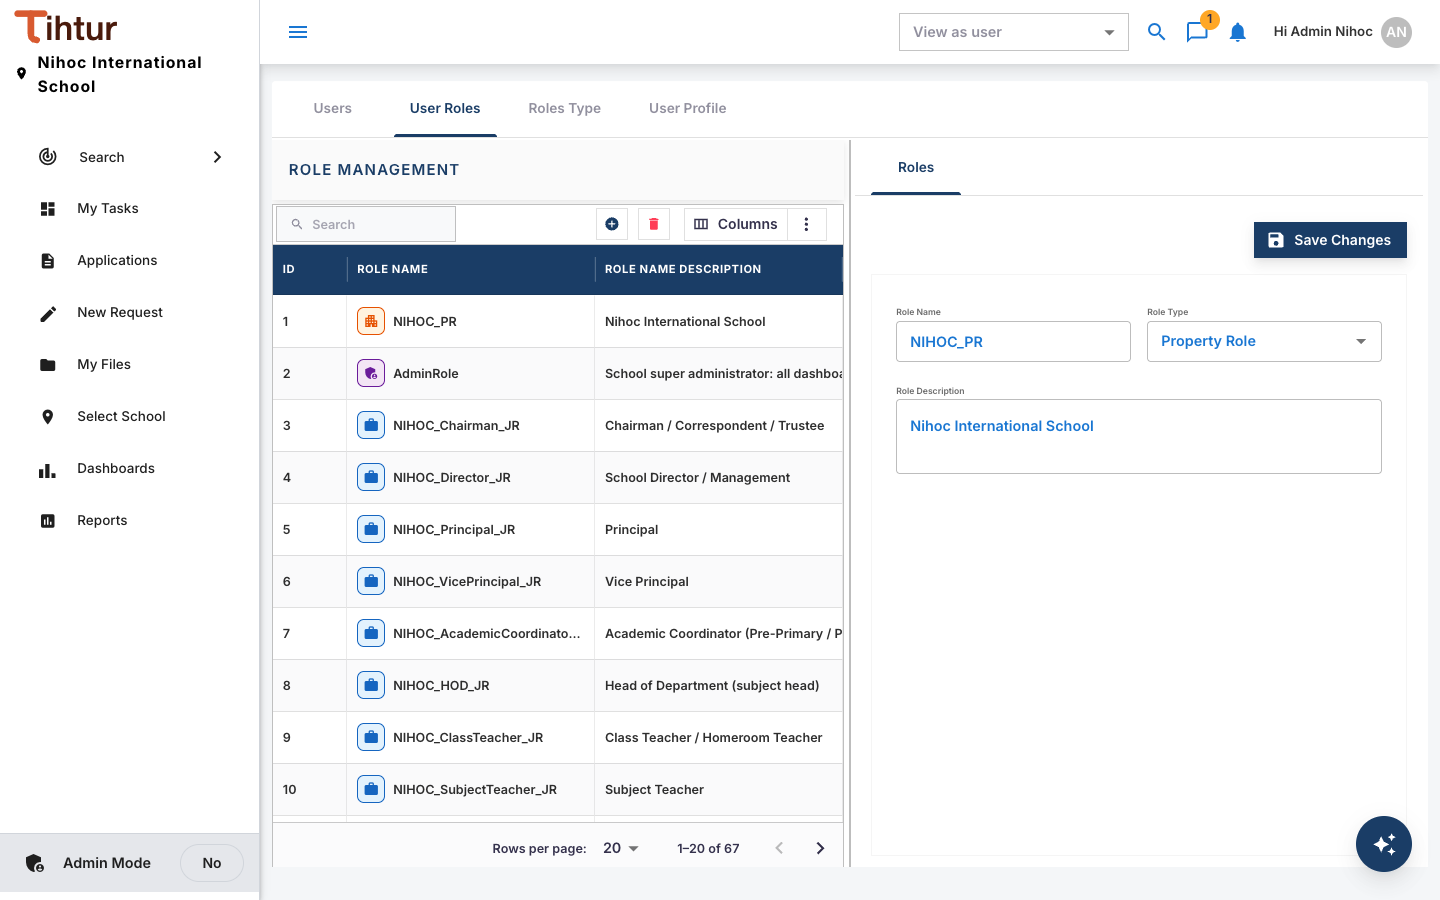
Roles are managed in Students & Staff (User Management), on the User Roles and Roles Type tabs.
The role types #
| Role type | Use it for | Example |
|---|---|---|
| Job Role | A position in the school. Most workflow steps are approved by a job role. | Principal, Class Teacher, Accountant, Admissions Officer |
| Approval Role | A decision right that does not follow one job. It lets you give the same approval to several positions, or move it without changing jobs. | Staff Leave Approval, Purchase Approval, Admission Approval |
| Security Role | Access to a family of records for search and viewing | Finance Records, Student Records, Staff Records |
| Property Role | Membership of one school or branch (see Structures) | NIHOC_PR, NIHOCBP_PR |
| GreenCardRole | AdminRole: sees and acts on every document type |
System administrator |
| OrangeCardRole | View-only access to everything | Demo login only |
Role types are already in place. You normally only create roles.
Create a role #
- Open Students & Staff → User Roles.
- Press the add button above the list and enter:
- Role Name: a short code (see the naming rule below);
- Role Type: Job, Approval, Security or Property;
- Description: in plain words, for example "Approves staff leave".
- Press Save Changes.
A naming rule that scales #
Start every role with the school code, and end it with its type. Lists then sort neatly, and nobody mixes up the types:
| Type | Ending | Example |
|---|---|---|
| Job | _JR |
NIHOC_Principal_JR |
| Approval | _AR |
NIHOC_StaffLeaveApproval_AR |
| Security | _SR |
NIHOC_FinanceRecords_SR |
| Property | _PR |
NIHOC_PR |
The demo school has 34 job roles, 14 approval roles, 15 security roles and 2 property roles.
Give roles to people #
- Give roles when you create or edit a user (Users), or
- use Roles Managers (on the Users tab) to add many users to one role at once.
A typical staff member holds:
| Person | Roles |
|---|---|
| Principal | Principal (job), several approval roles (admissions, staff leave, certificates, results, events …), most security roles, the campus property role |
| Accountant | Accountant and Cashier (job), Finance Records and Inventory Records (security), All Staff (security), the campus property role |
| Parent | Parent and Applicant (job), the campus property role |
Common mistakes #
- Giving the job role but not the approval role. The person sees the task but gets no Approve button.
- Forgetting the property role. The person sees nothing at all, or the wrong campus.
- One role per person. Prefer roles per position. People come and go; positions stay.