
Schools and branches (Structures) #
A structure (also called an entity) is one school or one branch, for example Nihoc International School and Nihoc International Begumpet. Every task belongs to one entity, and people only see the entities they belong to.
You set this up once, before creating users, because each user is linked to the schools they work in.
Why it matters #
- Separate data per campus. Begumpet staff see Begumpet tasks; main-campus staff see main-campus tasks.
- The right approvers. When a leave request from Begumpet needs the Principal, only the Begumpet Principal is asked.
- Reports per school. Dashboards and reports show the school selected in the header.
If you run a single school, you still create one structure for it.
Before you start #
Each entity needs its own property role: a role of the type Property Role that marks who belongs to that school. Create it first under Students & Staff → User Roles (see Roles).
Name it after the school's short code so it is easy to recognise, for example NIHOC_PR for the main campus and NIHOCBP_PR for Begumpet.
Add a school or branch #
Sign in as an admin and open Structures from the admin menu.
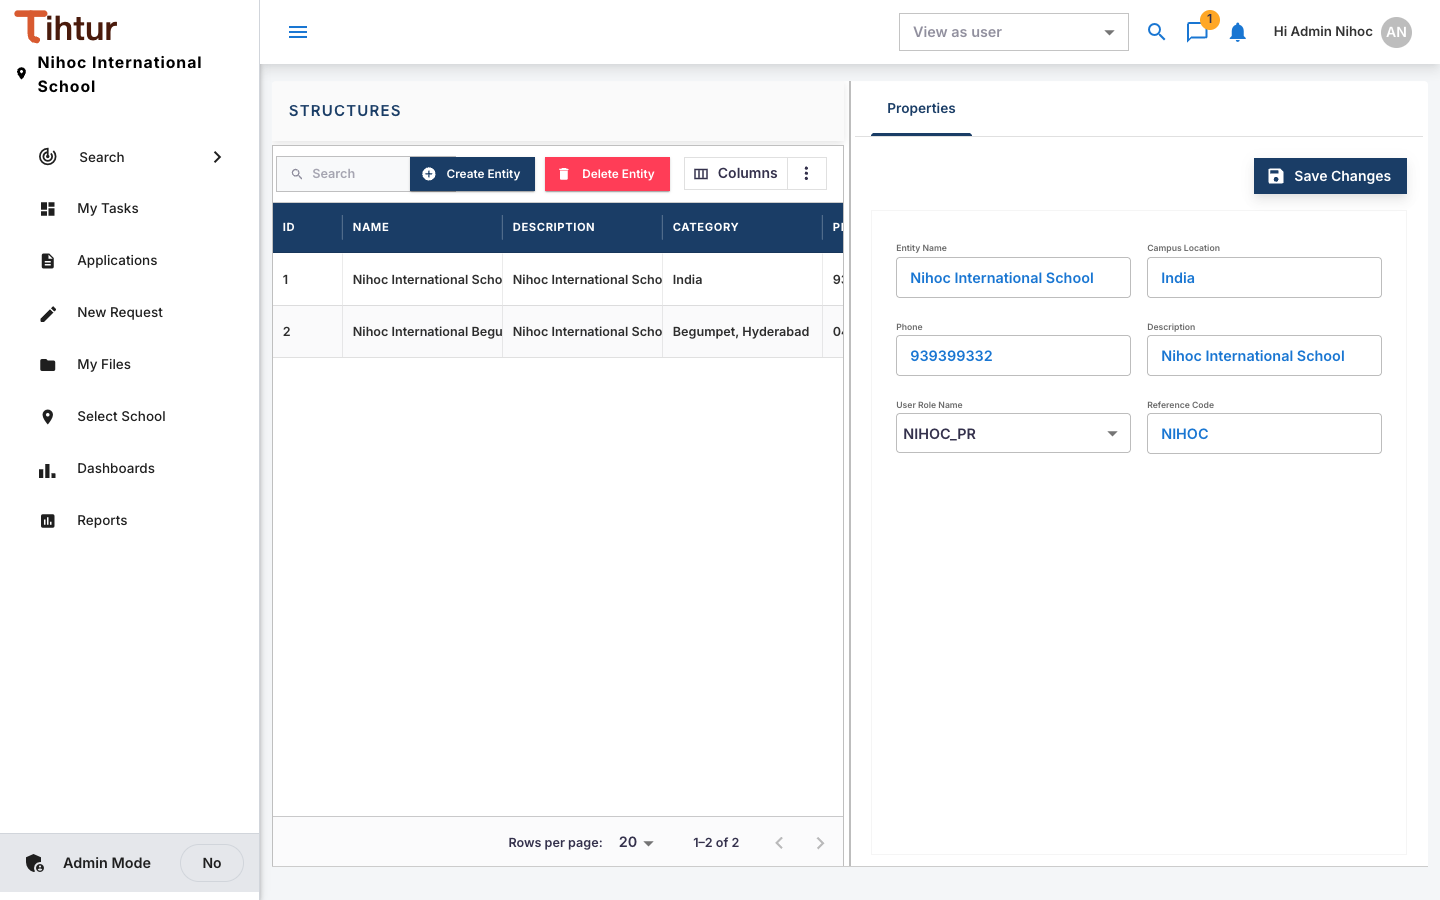
Press Create Entity and fill in the Properties on the right:
Field What to enter Example Entity Name The school's full name, as it should appear on screens and reports Nihoc International Begumpet Location Town or area Begumpet, Hyderabad Phone Main office number 040 4000 5678 Description A short note Nihoc International School, Begumpet campus Reference Code A short unique code, used in document numbers NIHOCBP User Role Name The school's property role you created earlier NIHOCBP_PR Press Save Changes. The school now appears under Select School for everyone who holds its property role.
Give people access to a school #
A user belongs to a school when they hold its property role. Give the role when you create or edit the user (Users):
- Staff of one campus get that campus's property role only.
- Directors or a central accounts team who work across campuses get both property roles, and can switch between schools in the header.
Important: job roles such as Principal or Class Teacher can be shared by both campuses. The property role decides which school's tasks the person sees and approves.
What is shared and what is separate #
| Separate per school | Shared by all schools |
|---|---|
| Tasks and their documents | Forms and workflows |
| Who approves (approvers must hold the school's property role) | Job, approval and security roles |
| Dashboards and reports (filtered by the selected school) | Master lists such as classes, routes and fee schedule (unless a list has its own school column) |
| Student and staff records that carry a school column | Report and dashboard designs |
Common mistakes #
- A user sees no tasks at all. They probably have no property role. Add the school's property role to the user.
- Select School is missing a branch. The user doesn't hold that branch's property role.
- Using one property role for two schools. Each school needs its own; otherwise their data is mixed.
Next: 3. Roles